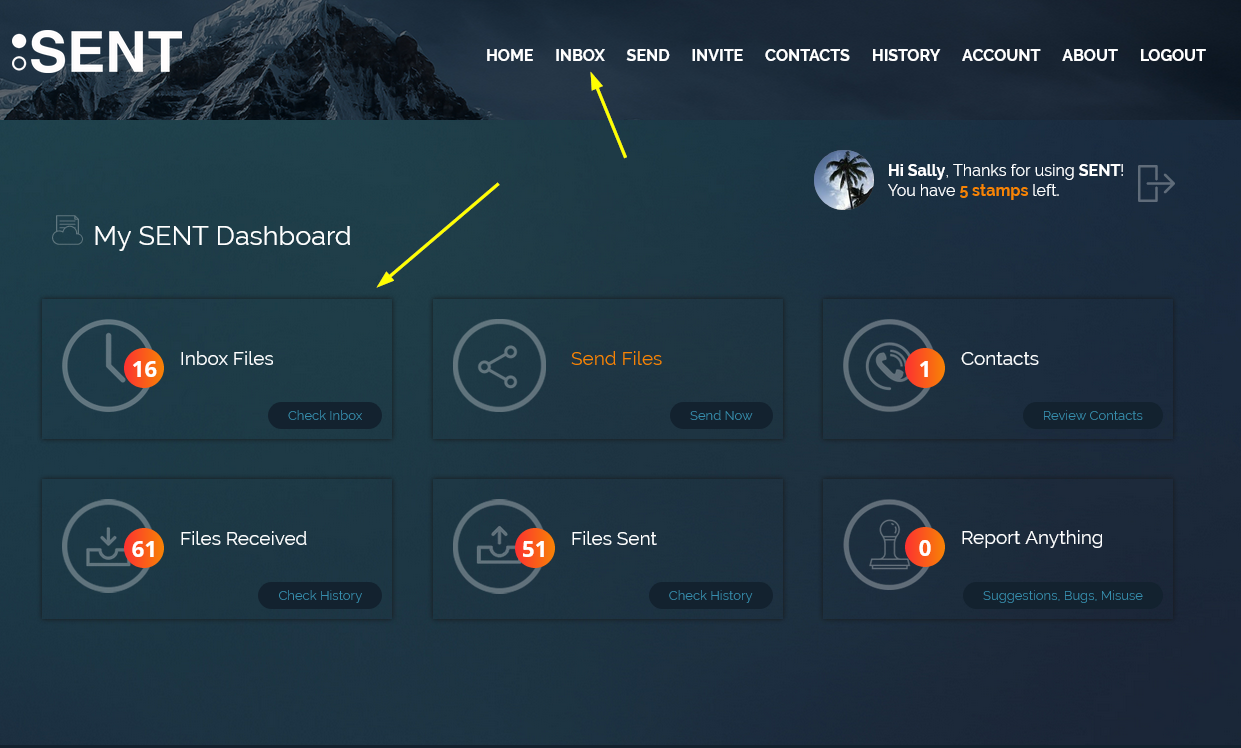
It’s not uncommon to need access to files at different locations because you are traveling or working from home or at a client site. If the files you need contain sensitive information, like customer data, or a private key, you can use SENT to safely transport your file to another computer by using SENT’s send to yourself feature. With other services, you might need to setup a secondary “dummy” account or use a personal account, no need with SENT, we built the feature right in. The simple steps below detail how to do it. Don’t forget, you can setup a free account at any time and get 5 free SENT Stamps a month so you can send yourself files whenever you need to.
STEP 1
Login to SENT. To send to yourself, start by navigating to the Send page. You can get there by clicking the Send Files button on your Dashboard, or by clicking on SEND from the menu bar at the top of the page (see the image above).

STEP 2
Click on the ME button and then Continue.
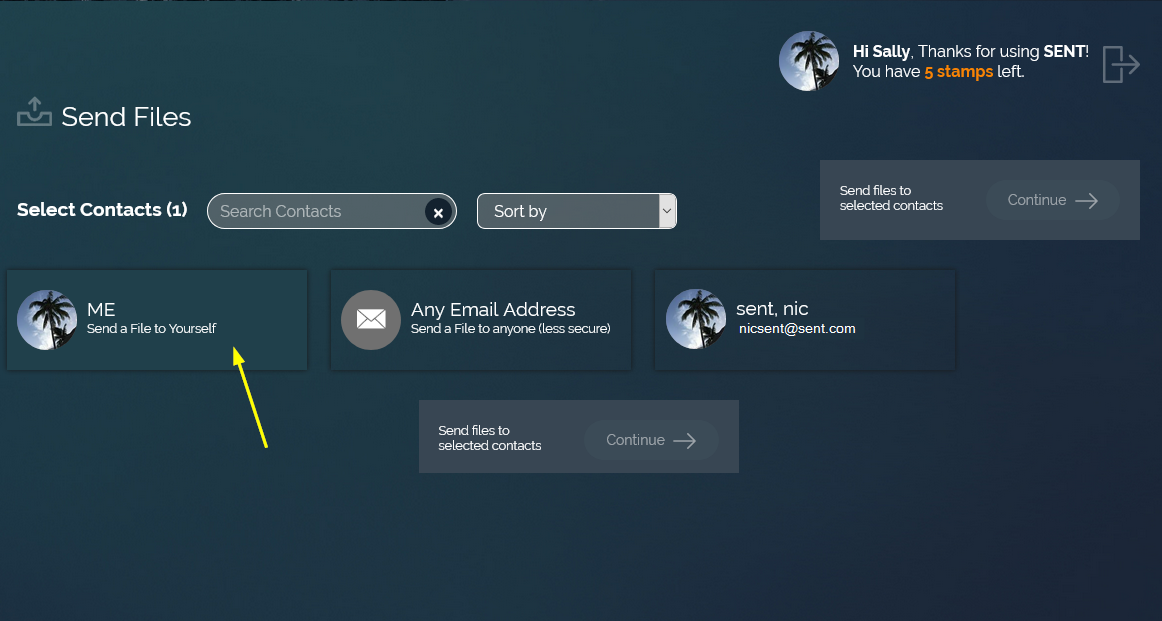
STEP 3
Click Choose Files to select one or more files to upload or drag and drop the files onto the web page.
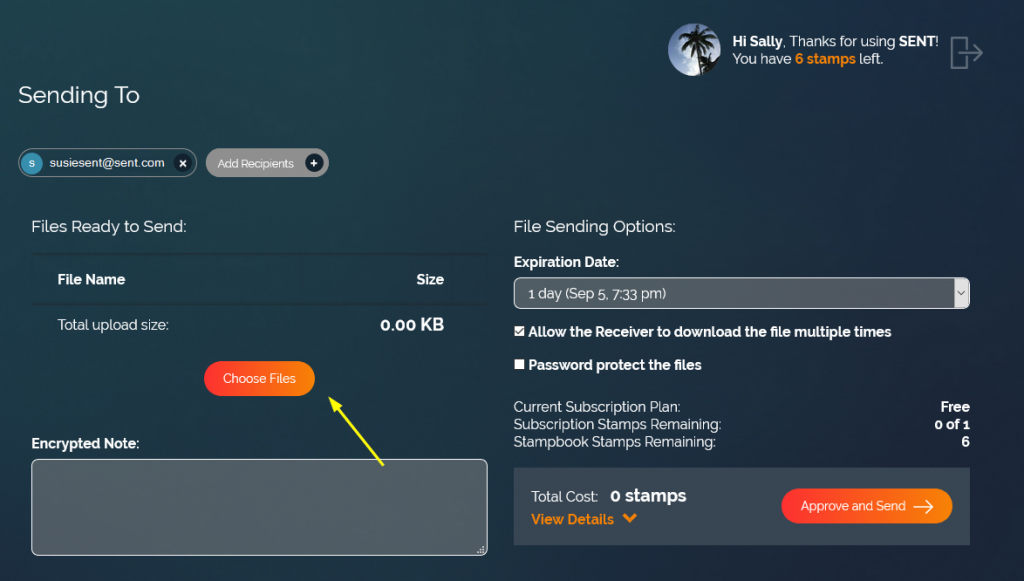
STEP 4
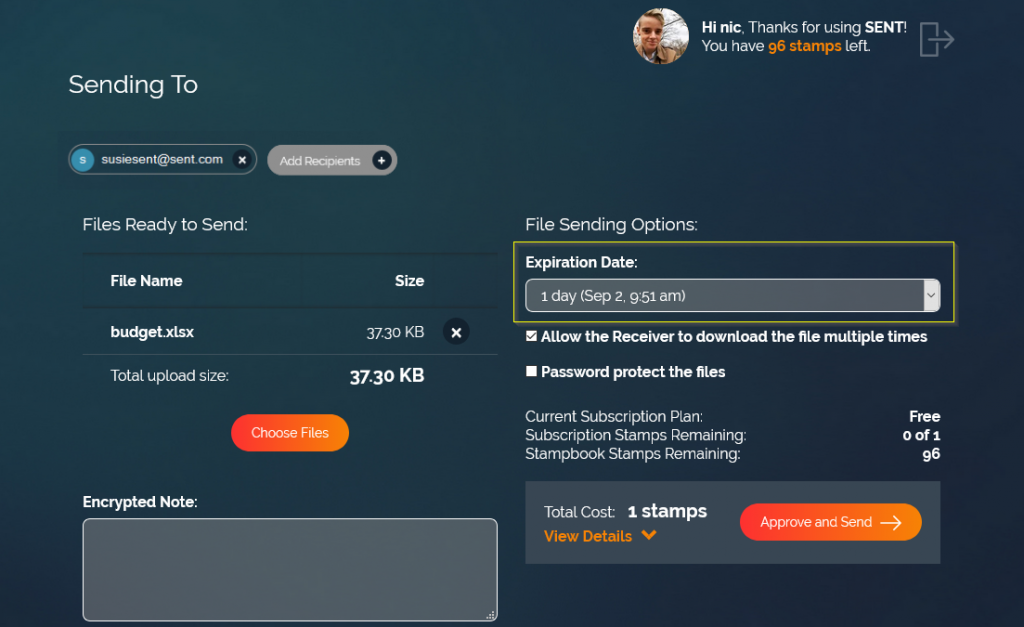
For the highest level of security, the default Expiration Date is set to 1 day. You can change this by using the drop-down menu.
STEP 5
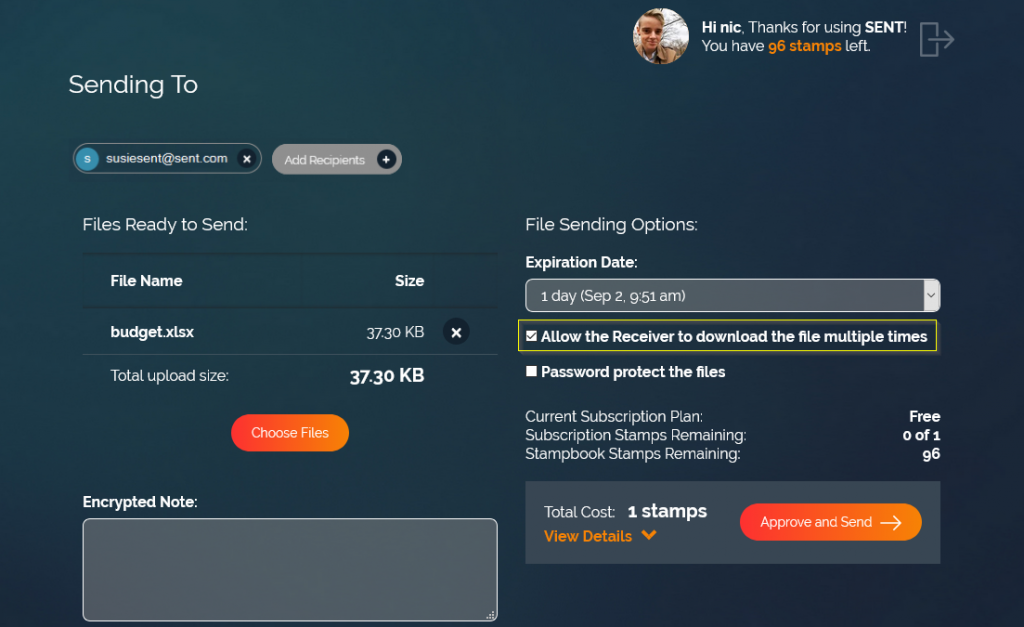
SENT will default to allow you to download your SENT file(s) multiple times. If you wish to, you can easily restrict it by unchecking the box. You can also add a password to the file for an extra level of security by checking the Password protect the files checkbox.
STEP 6
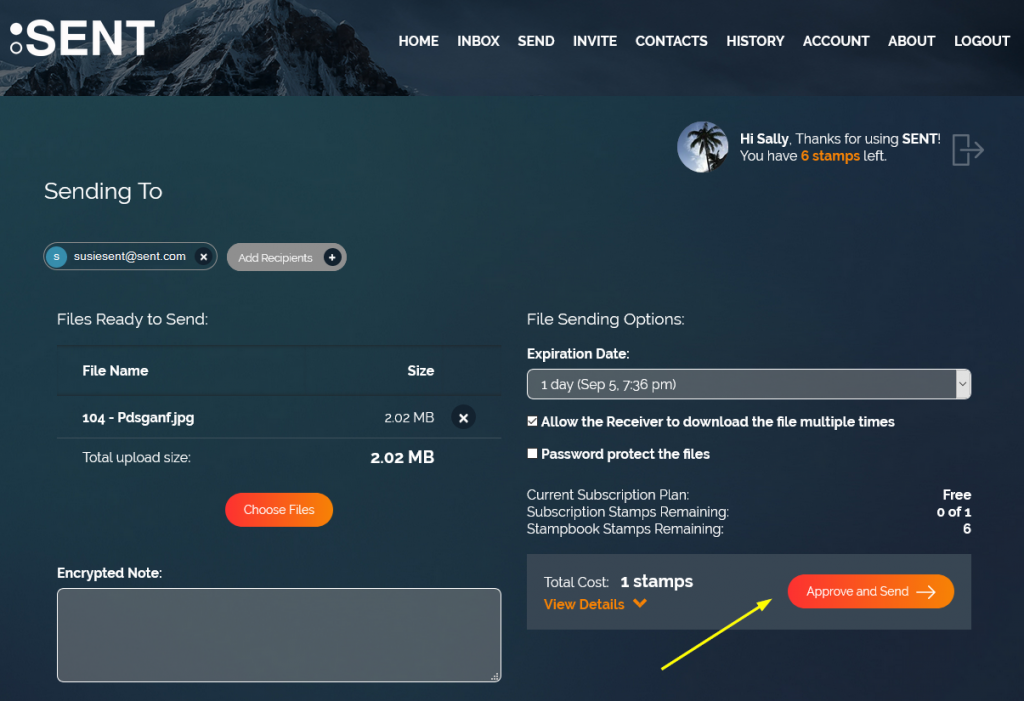
If you’re ready to go, click Approve and Send.
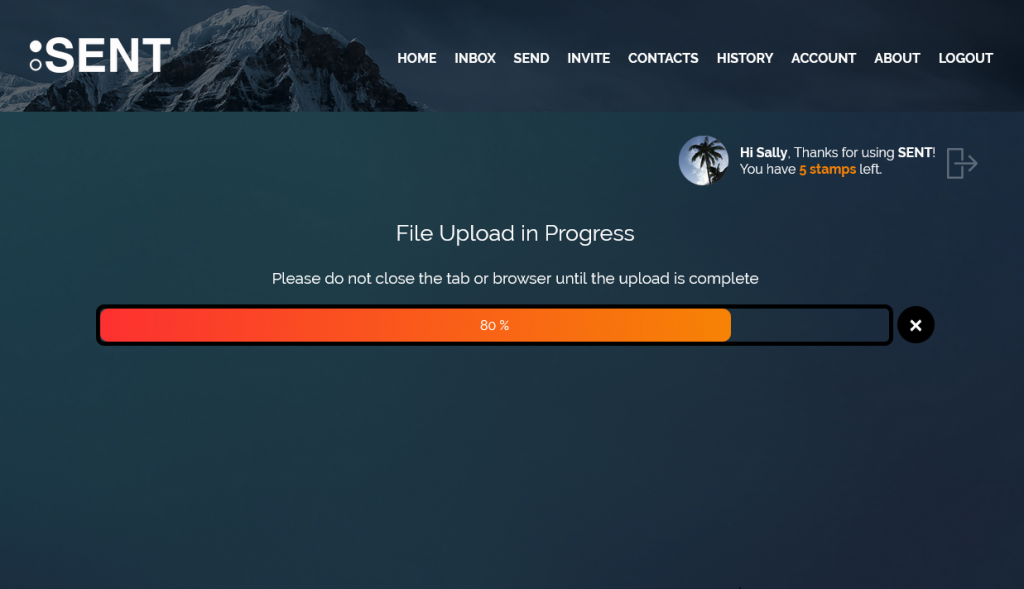
Your file will upload and get processed. You will see your stamp balance is updated accordingly.
Normally SENT will send out an email notification to the recipient. We don’t do that when sending to yourself. We figured you knew you SENT yourself the files 🙂
Feature Note
STEP 7
When you reach your destination (i.e. home, remote office, client site), login to SENT from a computer there (STEP 1) and go to your Inbox. The file will be there waiting for you.
